Rover 3.9 V8 Engine Overhaul & Rebuild.
Background.
As regulars to this site will know, when I set out to build my Rush in 2000, I bought a 1990 3.9 litre Rover V8 from a specialist breaker for use in the car. However due to salvage rules and Rover Heritage being unable to provide documentary evidence of the exact age of my engine I decided to buy another engine with proof of age to get me through the SVA (2002). The plan was then to swap them over.
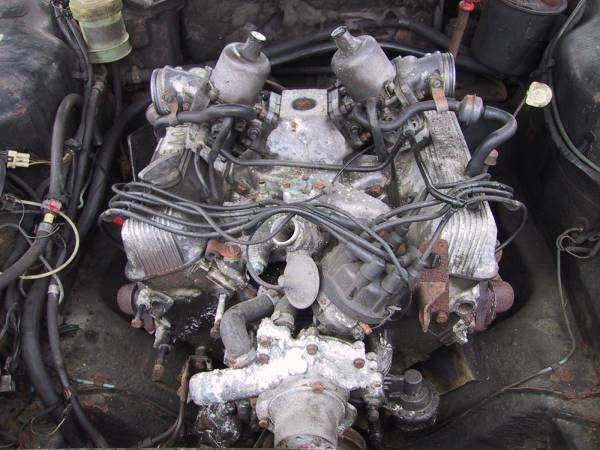
Here are the original pictures of the 3.5 and 3.9 when I purchased them:

Three years have since past and of course the swap never occurred - until now. Following a somewhat half-hearted attempt to sell the car this summer I decided that the next best thing was to 'upgrade'. So I set about dismantling the 3.9 engine for overhaul in preparation for the swap. I'll also take the opportunity to 'finish' the car a little more!
Strip down and clean-up.
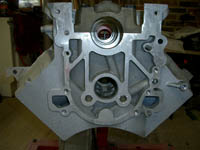
Having spent a very profitable afternoon stripping down the 3.9 engine I turned my attention to getting the block 'sorted'. Having researched the internet and found an organisation called the Federation of Engine Rebuilders, I decided to take pot-luck and take my block and crank to the nearest registered rebuilder. This turned out to be a small three man outfit working out of a farm outbuilding about 10 miles away. In my experience these sort of small scale operations only survive through offering a top class service at a reasonable price and I was not disappointed. I had the block pressure tested, hot cleaned, bores honed and core plugs changed for £190 and the crank journals checked and polished for another £45.
If you're interested their contact details are:
Graham Wellsted Engines
Speeds Farm, Farnham Lane, Langton Green, Tunbridge Wells,
Kent TN3 0JT
Tel: 01892 863600
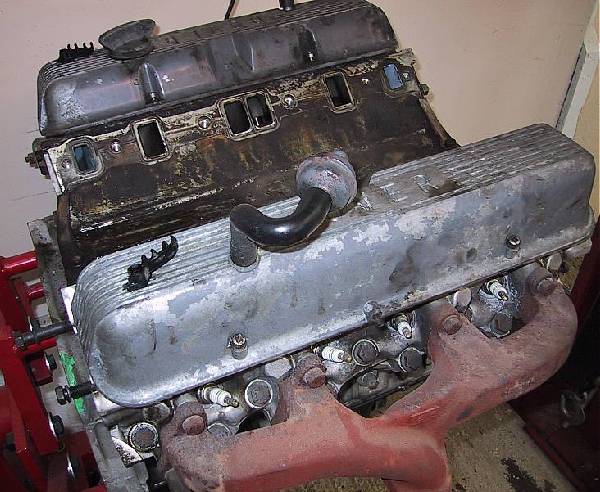
Here are some pictures post the 3.9 strip down and block reconditioning work:
The next steps.
As I knew that the engine was fairly low mileage and the crank journals were to spec I decided to replace the main and con-rod bearing shells with standard item from bought from RPI. I also purchased a full set of gaskets and replaced the crank oil seals at the same time as the bearing shells. As well as replacing the shells I bought an ARP main bearing cap stud kit from RPI to replace the standard bolts. This should make for a stronger bottom end with less chance of the bearing caps 'walking' in use and unevenly wearing the crank / bearings.
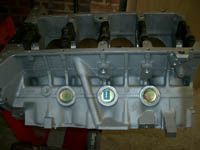
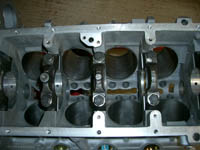
The result of these purchases can be seen here:

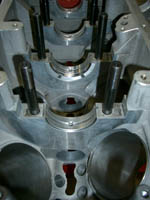
The next stage was to re-fit the pistons and con-rods using new bearing shells and bolts. I spent several hours cleaning up the pistons etc and fitting the new rings (checking the gap in the bore and filing to get the required 13 thou gap, 3-4 thou per inch of bore, 3.9 bore is 94mm or 3.7"). The con-rod bolts are very hard to fit with the pistons in place on the con-rods. I found the best way to fit them was to 'pull' them into their correct position using an old nut and washers to thrust against. With all of the pistons fitted, the results were as follows (shown with new tin gaskets to keep compression ratio at 9.35).
I then turned my attention to the heads. Originally I had intended to buy some new stage I or II heads but finances didn't allow. So I stripped down the originals and cleaned them up. I decided to try out the idea of putting them in the dishwasher (the wife was out) and I have to say that that they came out very clean indeed. However the dishwasher did smell of oil for several days until I could get to a supermarket to but some dishwasher cleaner!!
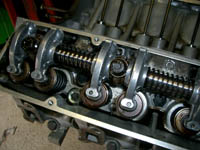
The rocker assemblies were quite worn and although RPI recommend that all parts are replaced, costs again come in to play. I bought two new rocker shafts from Rimmer Bros and salvaged the eight least worn rockers for use on the new shafts, along with eight new ones from RPI. I also had to replace one outlet valve as it seemed to have some metal embedded in its shaft making it unable to rotate in its guide and therefore making the valve seat grinding very difficult. Before fitting the new shafts, I reground all of the valves. I found that cutting the Halfords grinding tool in half and putting it into my drill certainly speeded up the process as well as saving my hands from blisters. The result of all this work can be seen here.
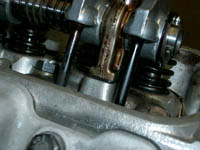
The heads were fitted to the block with new bolts also bought from RPI.
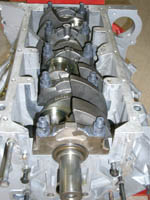
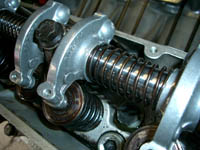
A couple of years back I bought a very low mileage Viper Hurricane camshaft for this engine and this was fitted next with no problems. 16 new cam followers (lifters) were also fitted. The whole rocker and lifter assembly then had to be shimmed to ensure that the lifter pre-loads were correct. This process is fairly simple if properly followed and the best instructions in how to do this can be found here: RPI Lifter Pre-load Page. Because I had replaced the rockers on one side only, and the shafts on both sides, I needed to fit different thickness shims to each bank. The results of this work is shown below.

Having set the pre-load I fitted the timing gear to the camshaft and crankshaft taking special care to ensure that the piston 1 was set to TDC (why? this will become clear later).
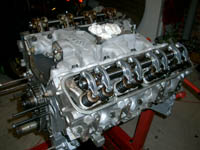
Here is the engine with the JWR-Offenhauser dual plane manifold fitted and ready to put back in the Rush.
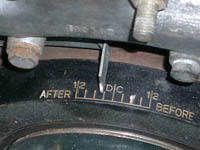
A Matter of Timing.
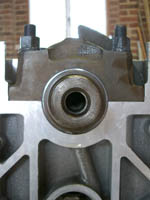
Once I had fitted the engine back into the car, I carefully replaced the timing cover and crankshaft pulley so as not to move anything. When I refitted the timing mark onto the front cover, it became clear that the marks on the crankshaft pulley were 3° out compared to the actual TDC of the engine. I had heard of this being the case with Rover engines and RPI recommend that this is checked first when trying to time the engine properly. In the following pictures you can see where the crankshaft pulley marks line up with the timing cover pointer. The blob of paint on the pulley is at 6° BTDC from the previous engine set-up so I will put a new blob at 3° BTDC to time the ignition properly taking the timing mark error into account.
So having statically timed the engine I completed the fitting of the rest of the ancillaries. Having upped the engine from 3.5 to 3.9 I had to re-jet the Carb to suit. RPI supplied me with the new metering rods and jets required for my Edelbrock 500 cfm carb. I had packed the oil pump with petroleum jelly prior to refit so that the system would prime easily. I turned the engine over for 30-seconds or so without the plugs fitted to ensure that the oil system primed before being started. Once this was done it was time for the big start-up. The first attempt to start the engine failed due to the ignition timing being 180° out (nice backfire and 5 foot flame through the carb - oops). I quick refit of the distributor fixed this and at the second attempt the engine fired into life. The whole exhaust note of the engine had changed to a much deeper roar. The whole car twists more when blipping the engine and feels so much more responsive (and powerful) than the 3.5. I'm now left wondering what I've done! However before I can put the car back on the road, the diff is going to be converted from 3.62:1 to 3.14:1 to make better use of all of that new torque.