August 2001
2nd August, 2001
Two notable events happened this week:-
-
Fitting the alternator turned out not to be the drama I imagined.
-
The correct prop shaft was delivered!
The alternator that Tim Hoverd recommended turned out to be perfect. He was kind enough to send me the details of a short Lucas (LRA461) alternator that fitted in the position originally intended.That is next to the water pump on the offside. The length of the alternator enabled me to fit it in front of the rocker cover without the pulley and fan assembly hitting the chassis cross member. Indeed the taller discovery water pump housing made bracing the alternator easier. The brace to the water pump housing is also acts as the tensioner (i.e. it is slotted). There's a very good picture of exactly how the front of my engine looks on the front cover of the Haynes V8 manual (except for the MG plenum cover). In fact an MGB V8 pulley belt would be perfect for my installation.

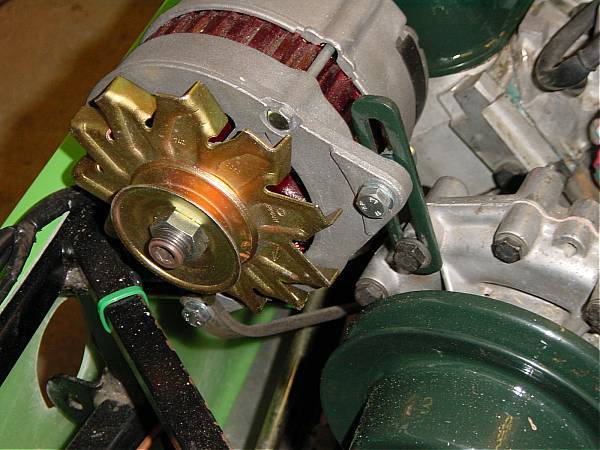
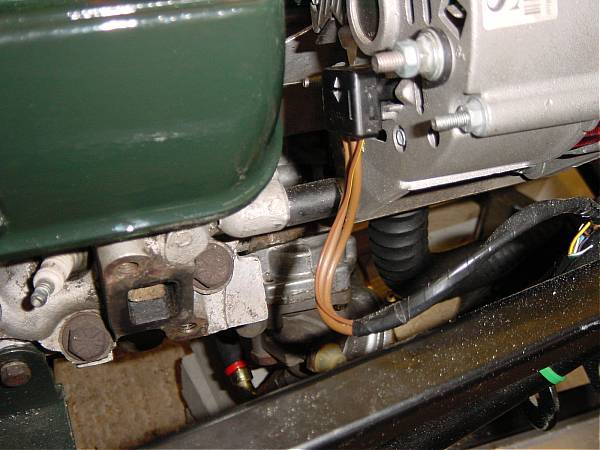
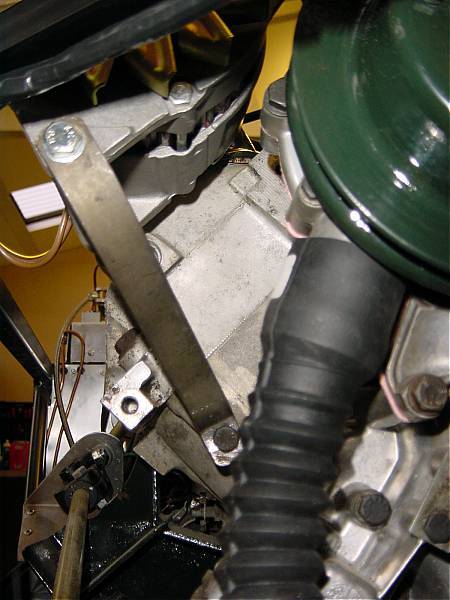
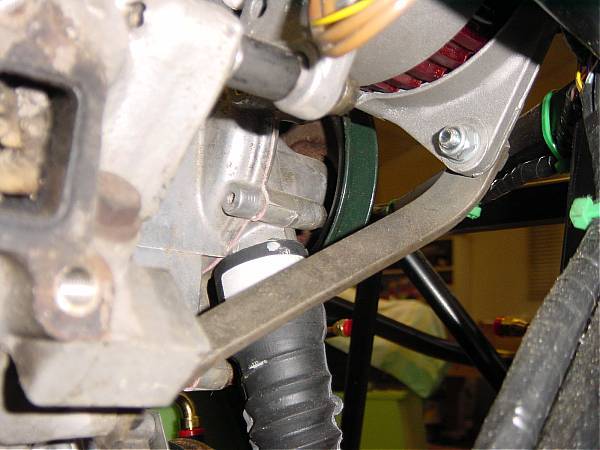
Initially I had to change the 'hand' of the alternator by removing the front cover and spinning it 120 degrees. With this done I noticed that, as luck would have it, the lower rear mount aligned with an existing tapped hole in the head (one of the original alternator bracket mounting holes) and it was then a simple matter of putting a bolt through the alternator mount into the head via a 25mm tube spacer. All that was then left was to make a steel strut to brace the front lower alternator mount from another tapped hole in the block. The whole thing is rock steady and only two strips of steel needed to mount it.
I then set about fitting the remote oil filter assembly. This contraption is quite large and the Dax chassis does not lend itself to easy places to mount it. I decided to fabricate another bracket to fit it on the lower nearside of the engine in the space that the alternator was going to be fitted. So it's off to Spa Aluminium on Friday for some angle section and offcuts of ally bar.
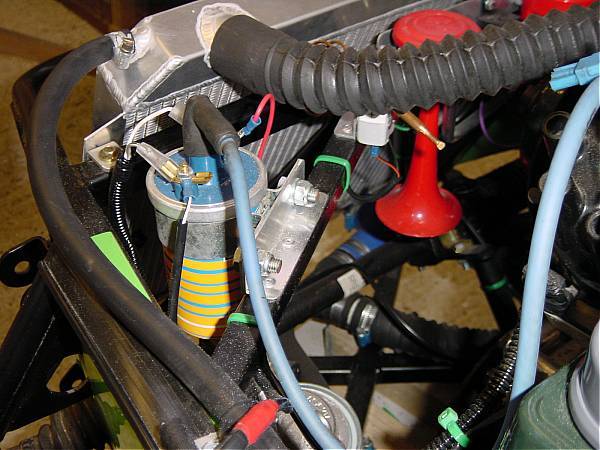
I have identified all of the connectors etc. on the EFI loom and fitting it into the new loom shouldn't prove to problematic. At the same time I cleaned up and fitted the distributor. The external ignition amplifier on the distributor has two connectors neither of which I have a loom for. In other words there's a little bit of head scratching to be done to work out which goes to where on the coil (which I haven't ordered yet) and the ECU.
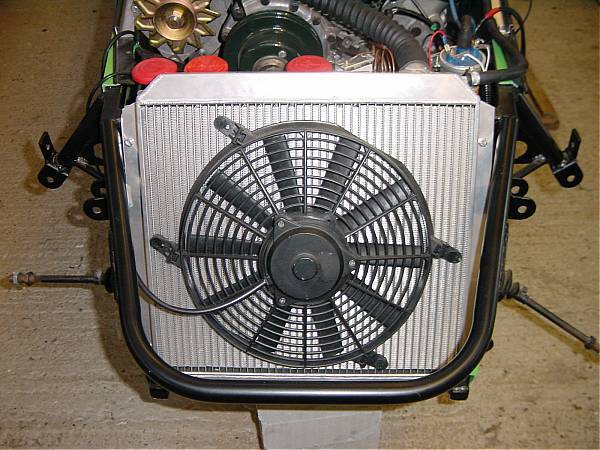
I have ordered all the necessary bits to fit the radiator including a nice big fan. I'm hoping to use the existing fan switch on the thermostat housing to operate this via a relay. That way I don't have to bother with fitting capillary fan thermostats which always leak (or at least they did on the Westie). Also ordered a very nice aero style filler cap and hose from Think Automotive (from where I also got all of the remote oil filter gubbins).
So next weekend is fitting the propshaft and then the gearbox remote. It will really then begin to seem like a real car once the front is connected to the back. If there's time the rad will go in, the oil filter fitted along with the aero style fuel filler. All that potentially remains to do is a little bit of wiring, fitting the battery and hey ho, I might actually try to fire the thing up. Oo er!!
Realistically I probably wont have time to do all of this before September due to business trips to the Kentucky Speedway for an I.R.L race, meetings in Indianapolis about this year's US GP and the a week with the family at EuroDisney. But then again, I do have some time off owing.....
4th August 2001.
Well, would you Adam and Eve it, tried to fit the propshaft and it was too long. Seems I have been sent the LWB version instead of the standard. Decided to wait until Monday to 'call' Dax and see what they have to say rather than vent my spleen there and then.
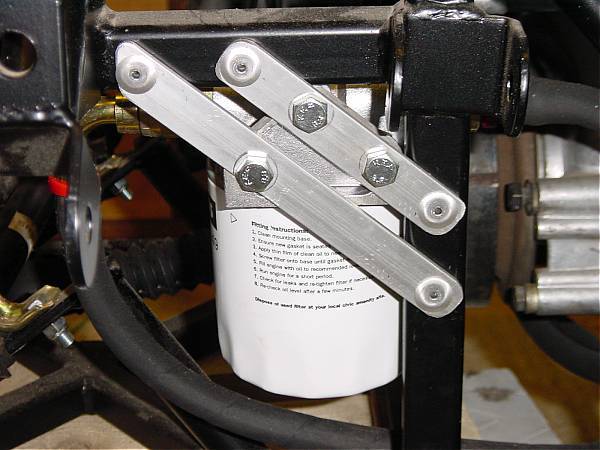
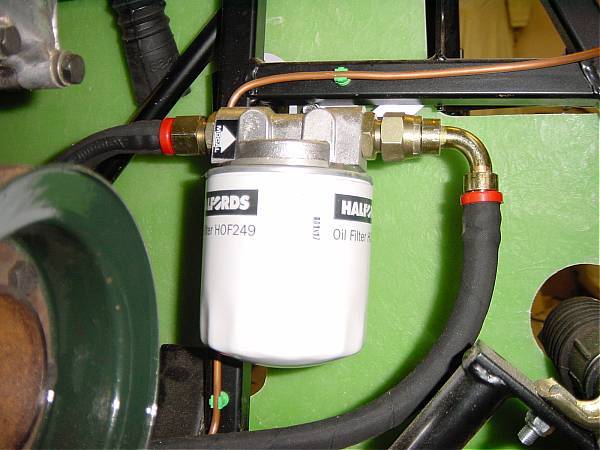
Still not to be deterred, carried on with fitting the remote oil filter assembly and the GRP sides of the Rush.
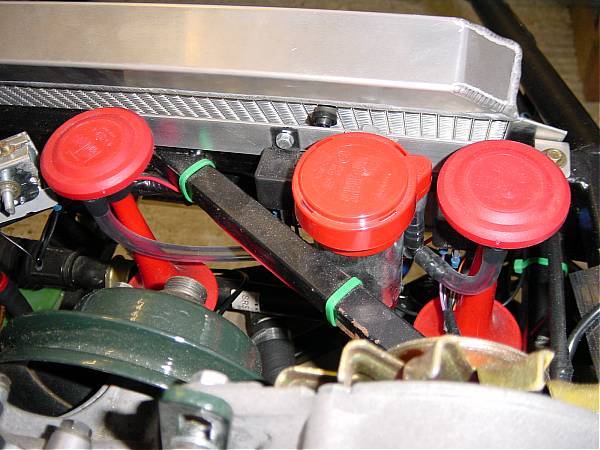
As explained before, the remote oil assembly is quite large especially with the filter attached. The following few pix show my solution which I hope you agree is quite neat.
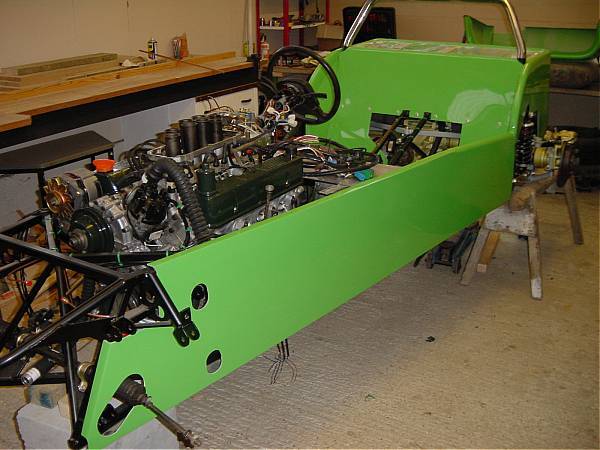
And here are the sides, in position ready to fit along with the scuttle:-
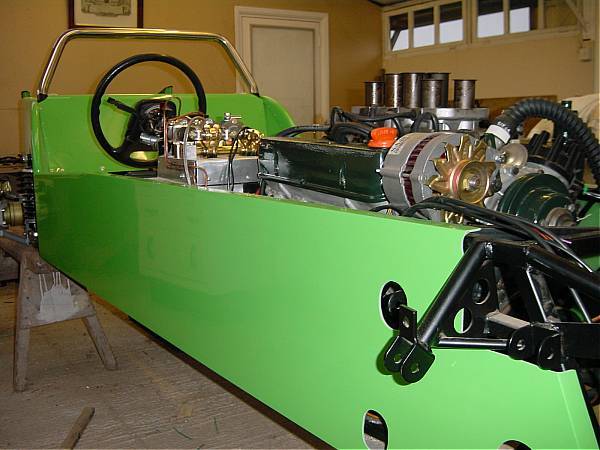
Trev's Tip- In the above right image you can see that the oil filler cap now screws directly to the rocker cover without the fill tower. Two things to note here, firstly the tower does unscrew but is a bu**er to shift and secondly without the tower, the cap is too long and needs to be cut down otherwise you might find that one of the rockers will not rock and it's hey ho time to strip the engine.
26th August 2001.
The last two weeks have seen many packages arrive to enable me to press on with finishing the engine installation.
Firstly, another trip to Harlow was required to return propshaft two, and to pick up a dashboard. I've gone for the contoured rather than the flatty. One thing to bear in mind is that unless you ask, Dax will supply the dash with the holes precut for their switches and instruments. I intend to fit my own choice of switches, dials and lamps and so collected an unprepared one. One other thing I noticed is that the GRP mould leaves marks on the dash to help with the hole cutting. I have to say that the areas marked out for the warning lamps were so badly aligned that it's little wonder I've seen so many Rushes with poorly aligned warning lamps. Time to correct the mould I'd say.
Anyway, with the lack of a propshaft I set about fitting the sides and scuttle. It is a lengthy task to get the side to mate neatly with the rear tub. I have to say that in my case this has turned out not as well as I would've liked. However a worse problem seems to be getting the offside panel to sit down properly where it abuts the rear tub. The whole side seesaws about the aluminium sheet (and rivets) that fills in the gap betwixt the pedal box mounts and the chassis side rails. This results in the side panel sitting 'high' and no amount of pushing down can get this meet up nicely with the rear tub. The result is an unsightly GRP thickness worth of height difference between the side panel and the rear tub. As usual, when I can borrow the camera again I will be able to add some pictures to show this.
Hmmm, as I write this I thought occurred. I've tried to make the side panel fit by grinding it down to meet with the rear tub. Perhaps a better approach would be to 'Dremmel' the rear tub as well to make the mating point higher up the tub?? Also perhaps the rear tub is at slightly the wrong angle and would be better tilted back slightly - too late to consider this option so I won't.
Anyway, it will all be covered up by the stainless kicking strips (I hope).
I can't believe the amount of spacing required between the side panel and the chassis when fixing it underneath the car. What is the reason for such a gap? Surely the moulding could be made without the 10mm tolerance along the bottom. I really just cannot see the point. Anyone care to enlighten me?? Very fiddly job putting all those washers in place.
Glued the 'wing piping' to the underside of the scuttle flange with Evostick contact adhesive (testing it on an offcut first to make sure that it didn't attack the GRP - seems not to). With that done I was able to bolt the scuttle down through the side panel flanges. This was set 260mm back from the front edge of the battery shelf as advised by William Turner on his site. I placed a 5mm piece of aluminium strip along the underside of the scuttle flange. This was to make up the gap between the scuttle and the battery tray as a consequence of the scuttle resting on the side panel upper flanges. Either I've gone completely wrong here or this part of the fit and build needs a complete re-think. I seem to remember being all at sixes and sevens with GRP fit during the Westfield build as well.
Finally I bolted the front portion of the side panels down using the bonnet stays. I'm sure that I will have to modify this to get the bonnet to fit but right now I just wanted to stop the wing piping from flapping all over the place.
All of the above was accomplished without the mysterious 'non-setting' mastic, uniquely available from Dax. I plan to remove all of the above and 'seal' it once I'm happy that the engine is running 'sweet'.
-
Coil.
-
Radiator (mounted on ally side supports to prevent possible flexing).
-
Pacet radiator fan.
-
Air horns.
-
Rear brake disc pads.
-
The correct propshaft!!!!!!! However I still need the bolts for the Sierra diff flange end.
-
Gearbox remote.
The gearstick that I had came with the new R380 remote bought from Ashcroft Transmissions. Once in place it was obvious that it was far too long (I think that it is also supposed to have an extension added on for LDV vans). It also had a bulge half way up it that contained a rubber anti vibration bush. So in fact the top 4" of the 'stick was not actually connected to the lower 7" except by rubber. With the aid of an angle grinder I split the bush's outer metal casing (much smell of burning rubber) and removed the upper section of the gearstick. I then had to grind off the bush's inner metal casing which then left me with a very nice 7" long gear stick nicely angled towards the driver. All that I need to do is thread the top to accept a suitable knob. Must remember to order a new reversing light switch from Rimmers.
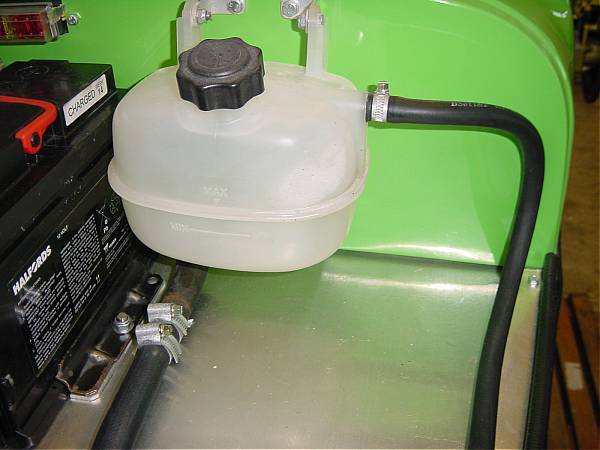
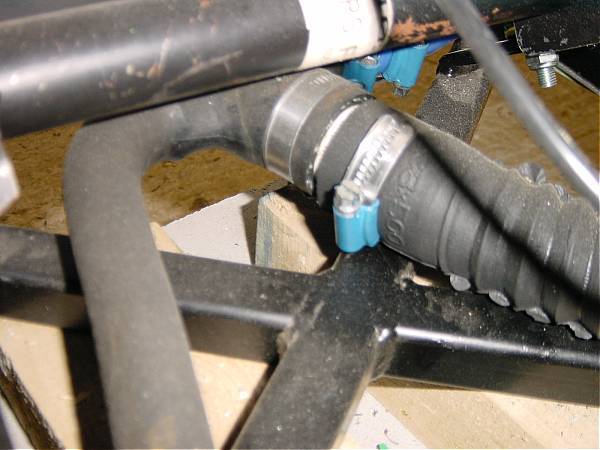
Finally, I went to the local breakers to source an expansion tank and a few useful bits of hose, especially 'T's (32mm diamater rad hose with a 12mm or so spur to run to the expansion tank). I propose to connect the expansion tank into the lower radiator hose. Why can't Dax make their rads with a 90 degree angled lower inlet to avoid the steering rack mount, rather than a straight? The tank that I found came from a Rover 200 Hatch. At least I think that's what it was. The front had been completely removed, up to the bulkhead, and the rest was so badly mashed that it was hard to tell. Anyway as luck would have it the expension tank was perfect. Small and came with its own bracket to mount to a near vertical surface. Got that and a selection of hose bits for a fiver! The tank is now sitting in a bucket of hot water and Sterident (whole tube) to shift the water stains. Should look as good as new.
Other than a battery, all I need to fire up the engine is an exhaust system. I really cannot justify spending £2k on a Dax system so I have decided to go my own way. I'll either buy a Custom Chrome V8 header kit or some mild steel tube from a supplier and bend my own with the aid of a Machine Mart tube bender (£100). Either way, should be able to produce something for £500 or so.
So that's the next step. May take a while but what I save on the exhausts, I can spend on the wheels!